Showing posts with label Cakes. Show all posts

Monday, November 25, 2013

Milestone

It's seemed like yesterday that I see my eldest child attending formal education. Such a cute looking boy in school uniform and carrying his school bag running around. Last month, I was this teary eye proud mother witnessing this "little boy" graduating with a Bachelor of Science (Finance & Accounting). At that moment, I finally understood how my parents felt when they attended my Convocation eons ago.


Walking down memory lane, it reminded me of a rather old recipe. If my memory did not fail me... this must be one of the very 1st cake that I ever baked. Learnt it in school and revisited this recipe a few months ago.

...Pineapple upside down cake -
 Hardly see this cake around..
It's such a moist and dense cake..
It's definitely on the sweet side... thus I cut down on the sugar.


PINEAPPLE UPSIDE DOWN CAKE ( adapted from Nigella Lawson's recipe)

Ingredients:
Butter (for greasing)
2 tbsp sugar
6 slices canned pineapple in juice (plus 3 tbsp of the juice)
11 glace cherries
100gm plain flour
1 tsp baking powder
1/4 tsp bicarbonate of soda
100gm butter (soften in room temperature)
100 gm caster sugar ( I reduced to 60gm)
2 large eggs

Method:

  1. Preheat the oven to 200C/400ºF.
  2. Grease a 23cm / 8-9 inch cake tin (not loose bottomed or springform tin)
  3. Sprinkle the 2 tbsp sugar on top of the buttered base and the arrange the pineapple slices to make a circular pattern.
  4. Fill each pineapple ring with a glace cherry, and dot one in each of the spaces in between.
  5. Put the flour, baking powder, bicarbonate of soda, butter, sugar and eggs into a food processor and run the motor until the batter is smooth.
  6. Pour in the 3 tbsp of pineapple juice to thin the mixture a little.
  7. Pour this mixture carefully over the cherry studded pineapple rings. It will only just cover it, so spread the mixture out gently.
  8. Bake for 30 mins, then ease a spatula around the edge of the tin, place a plate on top and turn it upside-down.


The cake is buttery.
 Love the aroma of the cake. 
Super easy to make.
If not the the load of calories piled in this cake... I'll probably bake it again :)

Sunday, May 20, 2012

Linda Collister's Espresso Brownies


OLYMPUS DIGITAL CAMERA
I have not baked Brownies for awhile….

Last night while I was reading some food blogs, this particular recipe from Bisous A Toi caught my attention. I like the idea of adding coffee to the brownies and the marble effect with the cream cheese.

As I happened to have all the necessary ingredients, I went ahead and baked it today.
OLYMPUS DIGITAL CAMERA         OLYMPUS DIGITAL CAMERA

This is a very aromatic brownie. Why would it not be?…. when there is so chocolaty. However, the scent of the coffee is rather faint. Perhaps I did not use a high quality coffee powder. Just used the normal instant Nescafe powder. Nonetheless, it is still delicious. The cream cheese layer (topping) has a slight crunch while the texture of the brownie is fine, moist and soft.

I did reduce the sugar by a little (as you know I am not a sweet tooth).
 
Linda Collister’s Expresso Brownies (adapted from Bisous A Toi )
Ingredients
230g Dark Cooking Chocolate - 70%
115g unsalted butter at room temperature
275g powdered sugar ( I reduced to 250g)
5 eggs - beat until just fluffy
2 tbsp instant coffee, dissolved in a little hot water
70g flour
60g cocoa powder
20g full cream milk powder
100g Cream Cheese - room temperature
125g Butter
2 eggs - small size
40g Flour

Method
Cream cheese mixture
Beat cream cheese and butter until soft
Add in eggs one at a time
Once combined add in sifted flour and continue to whisk - put aside

Brownies
Melt dark cooking chocolate using double boil method - set aside
On a stand mixer,whisk butter and sugar till soft
Add in instant coffee.
Add in beaten egg and continue to whisk
Add in sifted flour, cocoa powder and milk powder.
Add in melted dark cooking chocolate..
Once mixed switch off mixer and pour batter into 22 x 22cm pan.. smoothen the top.
OLYMPUS DIGITAL CAMERA
Pour a few dollops of cream cheese mixture on top of the chocolate batter.. do a little swirl to get a marble effect
Linda Collister's Espresso Brownies - with cream cheese swirls

Bake on preheated oven of 160C for 40-50 mins depending on your oven.
OLYMPUS DIGITAL CAMERA         Fresh from the oven

Tea time treat
Linda Collister's Espresso Brownies 1
This is a keeper.
I bet my children will be asking for it again soon ;)

Sunday, February 12, 2012

Bailey’s Buttercream frosting on Chocolate Coffee Cupcakes

Is it just me or did January 2012 just hit as a whirlwind???

I was looking at my calendar this morning and noticed that we are already into the 2nd week of February. Things have been moving so fast for me with our recent trip to Japan, followed by the beginning of school term, and Chinese New Year….

Now, the madness have slowly subsided and I am almost back to my normal routine…. Thank goodness!!!!

While blog-hopping a few days ago, I chanced upon a post by Elin which calls for using Bailey’s. Now, I have a bottle of Bailey’s sitting in my pantry which I hardly use. (Don’t quite know why I bought it during our last trip to Langkawi island last year).

So, this is what I made……………

P2071082 P2071083

The cake is moist and soft. With the combination of chocolate, coffee and almond, the aroma is to die for!!! The whole house smelt heavenly even before the cakes came out of the oven. The cake itself is not too sweet (perfect for my liking).

P2071081

In fact, they tasted good without frosting. We would have normally eat them out just like that!! Now you know…. my family are not a big fan of frosting. We also find the a tad too sweet for us.

However, this time I am determined to frost these cuppies. The aroma and taste of Bailey’s is just too alluring. So, I frosted them….

P2071087 P2071091

This is my first attempt of piping the frosting in this way. Not too shabby for a first timer, right? The buttercream is delicious though it is still too sweet for me. Since Bailey’s is pretty rich, perhaps the next time, I should cut down more sugar and add some salt to balance it up more.

Honestly, this is a yummy recipe. If you love chocolate and Bailey’s this is definitely something you should try!!!

Bailey’s buttercream frosting on Chocolate Coffee Cupcakes (adapted from Elin)

makes 6-8 cupcakes


Ingredients :

60 gm butter
80 gm castor sugar
1 egg
90 ml milk
60 gm dark chocolate
2 teaspoon cocoa powder
2 teaspoon instant coffee granules + 30ml hot water
75 gm self raising flour
40 gm ground almonds

Method :

1. Preheat oven to 180C and prepare cupcake cases on baking tray.
2. Combine instant coffee granules and hot water. Set aside. Melt the dark chocolate. Set aside.
3. Cream butter and sugar till light and fluffy. Add in egg and mix till well combined.
4. Sieve together flour, cocoa powder and add half to the butter mixture. Add in the ground almonds.
5. Add melted dark chocolate to the butter mixture.
6. Add in the milk and the balance of the flour mixture and mix well.
7. Scoop batter into cupcake cases and bake in preheated oven for approximately 20-25 minutes.
8. Take out and cool them on rack .

Bailey's Buttercream Frosting

40 gm butter
80 gm icing sugar
1 tbsp shortening
3 tbsp/ 4 tbsp  Baileys Irish Cream

Method:
Beat the sugar till light and fluffy, add in the icing sugar bit by bit alternately with Baileys till you get the right consistency.  Scoop buttercream into piping bag with icing nozzle of your choice. Frost  cupcakes.


*** Bon Appétit ! ***

Friday, October 15, 2010

Moist Chocolate Bundt Cake


It was my significant other half’s birthday a couple of days ago. Since DH does not fancy birthday parties, the occasion was just a very private family affair.

I had planned to made him his favourite “Steamed Yam Cake”. Stayed up late on the eve and steamed a tray of the Yam Cake. However, it was a disaster! I must have miscalculated the amount of water to be added and the cake was a tad too hard. Poor DH… despite that he still down a substantial amount of it for breakfast.

Feeling bad, I decided to bake him a cake instead. No fancy cake (with lots of icing) as he prefers it plain. Chocolate cake is my family’s favourite so it would be a good choice.

 OLYMPUS DIGITAL CAMERA

Instead of the normal Steamed Chocolate Cake, I have opted for a baked Chocolate cake using  sour cream. Simple yet delicious. It is such a jiffy to make. Light and moist…


Moist chocoalte bundt cake  …

. 

Moist Chocolate Bundt Cake

Ingredients

2 cups cake flour
1 cup cocoa powder
2 tsp baking powder
1/2 tsp salt
340g  unsalted butter, softened
1 3/4 cups granulated sugar (you may add up to 2 1/2 cup sugar – I like mine to be less sweet)
4 large eggs
2 tsp vanilla extract
1 cup sour cream

Method

  1. Position a rack in the center of the oven and preheat the oven to 160C. Grease the inside of a 10-inch Bundt pan. Dust with flour.
  2. Sift the flours, cocoa powder, baking powder, and salt into a medium bowl. Set aside.
  3. In a bowl of an electric mixer, using the paddle attachment, beat the butter at medium speed until very creamy, (about 2 minutes).
  4. Gradually beat in the sugar. Increase the speed to medium-high and beat until the mixture is well-blended and light, (about 4 minutes).
  5. At medium speed, beat in the eggs one at a time, mixing well after each addition and scraping down the sides of the bowl as necessary.
  6. Combine the vanilla extract and the sour cream. in a small bowl.
  7. At the low speed, add the dry ingredients to the butter mixture in 3 additions, alternating with the sour cream mixture in 2 additions and mixing just until blended.
  8. Scrape the batter into the prepared pan and smooth the top.
  9. Bake the cake for 65 to 75 minutes or until a cake tester inserted into the center comes out clean.
  10. Cool the cake in the pan on a wire rack for 15 minutes. Then invert the cake onto the rack and let it cool completely.

OLYMPUS DIGITAL CAMERA

Sunday, October 10, 2010

Orange Cranberry Chiffon Cake


Since I mastered the skill of baking a Chiffon Cake without any leavening or stabilizing agent (like sodium bicarbonate or cream of tartar), I would bake at least 1 chiffon cake a week. It is so simple, fast and most importantly, I know I have not added any chemicals into the food that will be consumed by my family.

Chiffon cake is light and is just great for snacking and also breakfast. I like to make them plain without frosting as we do not fancy food laden with heaps of sugar. So with no butter and reduced sugar, this type of chiffon cake is just what the family likes.

If you have been reading my blog, you would have noticed that I have made quite a variety of chiffon cake with the same recipe. Recently, I made one using fresh orange juice and dried cranberries. The aroma of the orange permeating from the oven while the cake was baking was just heavenly. Another keeper!!

OLYMPUS DIGITAL CAMERA         OLYMPUS DIGITAL CAMERA


For those who would like to give it a try, here is the recipe.


Orange Cranberry Chiffon Cake 

OLYMPUS DIGITAL CAMERA

Ingredients :

  1. 4 nos. egg yolk (size : grade A)
  2. 40ml corn oil
  3. 100gm superfine flour
  4. a handful of dried cranberries
  5. 1 tsp orange zest
  6. 70ml freshly squeezed orange juice (from 1 orange)
  7. 5 nos egg white (size : grade A)
  8. 45gm sugar (add more if you prefer or if the orange is sour)

Method :

  1. Preheat oven at 170 C.
  2. Combine egg yolks, oil, flour and orange juice and orange zest. Set aside..
  3. In another bowl or mixer, whisk egg whites till frothy.
  4. Gradually add in sugar. and lemon juice. Continue whisking till stiff peak is formed.
  5. Mix 1/3 of the egg whites into the egg yolk batter with a whisk.
  6. Gently fold in another 1/3 of the egg whites into the egg yolk batter.
  7. Fold in the remaining egg whites and the dried cranberries into the egg yolk batter. Do not over mix it as it will deflate the air bubbles..
  8. Pour batter into a chiffon cake tin and bang the tin a couple of times to release the trapped bubbles.
  9. Bake in the oven at 170C for 30- 35 mins or till cooked.
  10. Remove cake from oven and invert it immediately to cool for at least 30 mins before slicing.

Orange Cranberry Chiffon cake - tinOrange Cranberry Chiffon cake - in oven

Monday, August 16, 2010

Pandan with Black Sesame Cake Bread


I am back to my bread making routine.

While driving my children to school this morning, I was contemplating what kind of bread or bun I should make today.  Thought of making something different today. Since I could not decide whether to bake a cake or a loaf of bread, I finally settled for a combination.

OLYMPUS DIGITAL CAMERA

This is what I baked! It is chiffon cake on top and bread at the bottom. This is so pretty (don’t you agree?).

Remember the bread dough that I had prepared last week? The 65度C汤种面包 (65degC Tang Zhong Bread) ?? I still had a portion in the freezer. I had pull it out from the freezer this morning to defrost. This dough yields a very light and fluffy texture. So , I thought of experimenting it with a pandan chiffon cake on top. To enhance its flavour and the appearance I spread a thin layer of black sesame paste on top of the bread dough before pouring the chiffon cake batter on top.

OLYMPUS DIGITAL CAMERA

The end result is good. The nutty aroma of the black sesame paste complements the heavenly aroma of the pandan chiffon cake!  However, I do have a slight issue. See the loaf before I slice it…. Initially the cake portion rose beautifully and the shape was a perfect rectangular loaf. However, after cooling down, the cake portion shrank and it looks distorted. Whenever I bake a chiffon cake, I would need to invert the cake while cooling it. This prevents the cake from shrinking as a result of gravitational pull. Unfortunately, when I bake it with the bread dough, I am not able to do so. (anyone has any tips on how to do it???).

 OLYMPUS DIGITAL CAMERA

Luckily, it did not shrink that much and the slices look great. I managed to produce 2 loaves with the ingredients I have. Gave one to Mommy dearest and the other loaf shall be our breakfast for tomorrow. 

OLYMPUS DIGITAL CAMERA

It’s quite easy to make. Here is the recipe.

Pandan with Sesame Paste Cake Bread 

The Bread portion  (I only use half of this dough)

tang zhong (water-roux)

25g bread flour
125ml water

bread dough:

315g bread flour
85g cake flour
30g milk powder
60g caster sugar
1/2 tsp salt
9g instant yeast
1 egg, lightly beaten

120g water
120g tang zhong (water-roux)
35g unsalted butter

Method:

to make tang zhong (yields about 120g tang zhong):

Place 25g bread flour in a saucepan. Add 125ml water, mix till smooth, making sure there are no lumps of flour. Cook over medium to low heat, stirring constantly with a hand whisk to prevent it from burning. Within 1 to 2 mins, the mixture will start to thicken, stop when you see traces in the mixture for every stir you make with the hand whisk.The 65degC tang zhong is ready. Immediately transfer the hot tang zhong into a bowl and cover it with a cling wrap, making sure the cling wrap sticks onto the surface of the mixture. This is to prevent a film from forming on the surface. Leave to cool completely before using it.


to make dough:

Mix all the dry ingredients in a mixing bowl. Make a well in the centre and add in the egg, water and tang zhong. Mix to form a rough dough. Transfer dough to a lightly floured work surface. Knead the dough till smooth. This should take about 10mins. The dough is quite wet and sticky, it helps to have a dough scraper on hand to scape up the dough as your knead.
Knead in the butter. Continue to knead the dough until it no longer sticks to your hand, becomes smooth and elastic. This should take about another 20 to 30 mins. Do the window pane test: pinch a piece of the dough, pull and stretch it. It should be elastic, and can be pulled away into a thin membrane without tearing/breaking apart easily.

Divide the dough into half and keep a portion in the freezer for later.

Proof one portion the dough for about an hour or until double in bulk.

Punch it down and divide the dough into 6 equal portions.

Let it rest for about 10 mins.

Shape the dough into 6 cylindrical shapes and place 3 each  into 2 loaf pans (lined with baking sheet/ parchment paper).

Let it proof for about 60mins or till double in size.

The Black Sesame Paste

Heat up 4 tbsp organic black sesame powder with 2 tbsp brown sugar in a small saucepan over medium fire. Keep stirring to prevent the mixture from burning. The mixture will coagulate and turn into a very thick paste. Remove it from the fire and let it cool down.

Pandan Chiffon Cake portion (prepare this portion when the bread dough has double in bulk).

Ingredients

  • 3 egg yolks (Grade A)
  • 30 ml corn oil
  • 80 gm superfine flour
  • 50ml fresh coconut milk
  • 2 pandan leaves blend into juice (add 1 tbsp water)
  • 4 egg whiles (Grade A)
  • 40gm castor sugar (add more if preferred)
  • 0.5 tsp lemon juice (optional)

Method

  • Combine egg yolks, oil, flour, pandan juice and coconut milk.
  • Mix till well blended. Set aside.
  • Whisk egg white till frothy
  • Gradually add in sugar and lemon juice and whisking till soft peak is formed.
  • Whisk in 1/3 of the egg white mixture into the egg yolk batter till well combined.
  • Fold in another 1/3 of the egg white mixture followed by the balance. Do not over mix the batter

To assemble :

Once the bread dough is ready (double in bulk), spread a thin layer of the black sesame paste (if the paste is too thick, add some warm water to dilute it) over the top of the dough.

Pour the chiffon cake batter on top of the bread dough (divide them equally for the 2 loaf pans).
Gently tap the loaf pan a couple of time ( to release the trapped air bubbles in the cake batter) .

Bake them in a preheated over at 180C for about 30mins.

Remove form the loaf pan onto a cooling rack immediately (once baked).

Sunday, May 30, 2010

Swedish Visiting Cake


I have been keeping my oven working almost daily. However, I have not been posting much of my bakes lately as I just find taking photos and uploading them such of a hassle. Not to mention I have also been slacking in updating my blog. ;(

This morning I visited my favourite foodblog " The Little TeoChew" and saw this very delicious looking muffins (photo from The Little Teochew....thanks Ju, your photography skill is a class above)

I just go to get my hands on them. After serving breakfast, I told my little girl that I must bake something. Showed her the post and she is in agreement that we need to have them on our table.
So, got out all the ingredients and this is what we got for tea!


Swedish Visiting Cake
(from
The Little Teochew)
Makes 8 to 10 servings

Ingredients :
- 1 cup sugar, plus extra for sprinkling
(I used 0.8 cup)
- Grated zest of 1 lemon
- 2 large eggs
- 1/4 teaspoon salt
- 1 teaspoon pure vanilla extract
(I used vanilla beans)
- 1/2 teaspoon pure almond extract
- 1 cup all-purpose flour
- 1 stick (8 tablespoons) unsalted butter, melted and cooled
- About 1/4 cup sliced almonds (blanched or not)
( I used almond nibs)

Method :
  • Center a rack in the oven and preheat the oven to 350 degrees F (about 175 degrees celsius). Butter a seasoned 9-inch cast-iron skillet or other heavy ovenproof skillet, a 9-inch cake pan or even a pie pan.
* Like The LittleTeochew, I used a muffin tray

  • Pour the sugar into a medium bowl. Add the zest and blend the zest and sugar together with your fingertips until the sugar is moist and aromatic. Whisk in the eggs one at a time until well blended. Whisk in the salt and the extracts. Switch to a rubber spatula and stir in the flour. Finally, fold in the melted butter.
  • Scrape the batter into the pan and smooth the top with a rubber spatula. Scatter the sliced almonds over the top and sprinkle with a little sugar. If you're using a cake or pie pan, place the pan on a baking sheet.
  • Bake the cake for 25 to 30 minutes, or until it is golden and a little crisp on the outside; the inside will remain moist. Remove the pan from the oven and let the cake cool for 5 minutes, then run a thin knife around the sides and bottom of the cake to loosen it. You can serve the cake warm or cooled, directly from the skillet or turned out onto a serving plate.
The cake is delicious .. slightly crispy outside whilst the inside is soft.


However, being less of a sweet tooth, we find it a tad too sweet for us. So the next time I will further reduce the sugar to 3/4 cup.

Mine is square!

Monday, May 10, 2010

Banana Crumb Muffin

I had some bananas which were overly ripe last Thursday. As the skin had turned slightly black, my children were reluctant to consume them. It will be a waste to discard them. So I turned them into muffins.

I googled for a good banana muffin/cupcake recipe and found this in Allrecipe.com.


The minute I read through the recipe and saw the number of positive reviews on it I was SOLD. I have got to turn those pathetic bananas into the scrumptious and aromatic muffins.


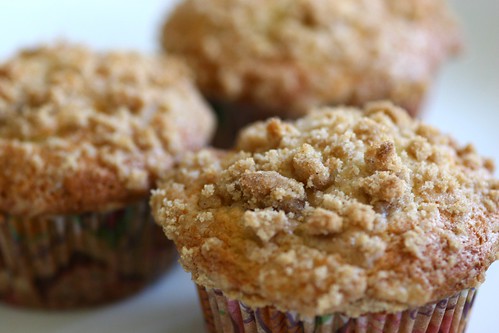
These muffins smell so heavenly when freshly out from the oven. The crumbs give a crunchy twist to this soft and light muffin.


I did reduce the sugar in my muffin as we prefer them to be less sweet.


Banana Crumb Muffin (adapted from Allrecipe.com)

Ingredients

  • 1 1/2 cups all-purpose flour
  • 1 teaspoon baking soda
  • 1 teaspoon baking powder
  • 1/2 teaspoon salt
  • 3 bananas, mashed (I used 4 )
  • 3/4 cup white sugar (I reduced to ½ cup)
  • 1 egg, lightly beaten
  • 1/3 cup butter, melted
  • 1/3 cup packed brown sugar
  • 2 tablespoons all-purpose flour
  • 1/8 teaspoon ground cinnamon
  • 1 tablespoon butter

Method

  1. Preheat oven to 375 degrees F (190 degrees C). Lightly grease 10 muffin cups, or line with muffin papers.
  2. In a large bowl, mix together 1 1/2 cups flour, baking soda, baking powder and salt. In another bowl, beat together bananas, sugar, egg and melted butter. Stir the banana mixture into the flour mixture just until moistened. Spoon batter into prepared muffin cups.
  3. In a small bowl, mix together brown sugar, 2 tablespoons flour and cinnamon. Cut in 1 tablespoon butter until mixture resembles coarse cornmeal. Sprinkle topping over muffins.
  4. Bake in preheated oven for 18 to 20 minutes, until a toothpick inserted into center of a muffin comes out clean.

Tuesday, May 4, 2010

Walnut Pandan Chiffon Cake


I love baking simple cakes especially those that I can throw in whatever I can find from my pantry. The Chiffon cake that I normally bake is one of those that fits this description. It is something that I can whip up in less than an hour (10 mins preparation and 30mins baking).

I had some leftover santan (coconut milk) in my fridge and a packet of walnuts. So, I took 3 blades of pandan leaves from my garden and...... Viola !!!! I am ready to bake this wonderful and easy cake.


Walnut Pandan Chiffon Cake


Ingredient

4 Egg Yolk

Coconut Milk 70g + a pinch of salt

Superfine Flour 100g

3 blades of Pandan leaves (blend with 2 tbsp water till fine)

5 Egg White

Castor Sugar 40g (add more if u like it sweet)

0.5 tsp lemon juice (optional)

Roasted walnuts

Method:-

  1. Combine Ingredient 1 - 4 until well blended, leave aside.
  2. Beat egg whites with electric beater till frothy, add in the sugar and lemon juice. Then continue to beat till stiff peaks are formed.
  3. Mix 1/3 of egg white into egg yolk batter, and then FOLD in remaining egg white foam into batter with a whisk.
  4. Line the chiffon tin with walnuts
  5. Pour batter into chiffon tin and bang the tin to release the bubbles.
  6. Bake in preheated oven 175°C for 30 - 35 minutes* or till cooked.
  7. Remove from oven and invert cake tin immediately for 30 minutes.

* Adjust the temperature and timing according to your oven !


Note : By blending the pandan leaves, it will yield a dark green colored and more fragrant cake compared to just using the juice.

The walnut adds an additional texture and the nutty taste is a great match to the pandan chiffon cake.

Verdict : This is a keeper.

Monday, April 19, 2010

Carrot Cake Bread


I do not know if this is the correct name for this bread. I made it yesterday as I was trying to play around with the ingredients I have.


I have seen some bakeries selling chocolate bread topped with pandan or vanilla sponge cake. Instead of making the same as those bakeries, I decided to make a similar bread with different ingredients. For the bread, I used the Hokkaido Milk Bread with purple rice. The recipe is here. I had this dough prepared earlier and frozen. So, all I need to do is to pull out this dough and let it on the counter to defrost and prove.

For the topping, instead of the normal vanilla sponge, I used my chiffon cake recipe below.

Carrot Chiffon Cake.

Ingredients

4 egg yolks (Grade A)
40 ml corn oil
100 gm superfine flour
1 carrot finely grated and blended with 2 tbsp water (about 100gm)
1 tsp paprika
5 egg whiles (Grade A)
50gm castor sugar (add more if preferred)
0.5 tsp lemon juice (optional)

Method
  1. Combine egg yolks, oil, flour, carrot and paprika.
  2. Mix till well blended. Set aside.
  3. Whisk egg white till frothy
  4. Gradually add in sugar and lemon juice and whisking till soft peak is formed.
  5. Whisk in 1/3 of the egg white mixture into the egg yolk batter till well combined.
  6. Fold in another 1/3 of the egg white mixture followed by the balance. Do not over mix the batter

To assemble and bake this bread :

  1. Once the bread dough doubles in size, punch it down and divide into 4 portions.
  2. Shape them into balls and let them rest for 15mins.
  3. Form the dough into 4 long strips.
  4. Place 2 strips each into 2 loaf tin (lined with parchment paper)
  5. Prove for about 45 -60mins until the dough double in size.
  6. During the last 10 mins of the proving, prepare the carrot chiffon cake mixture above.
  7. Pour half this mixture on top of each loaf tray.
  8. Bake in a 170C preheated oven for about 35-40mins.

Since I baked 2 loaves, I gave one to my mother. The bread has a bright yellow colour on the cake portion. No colouring is added as it is purely carrot! The bread portion on the other hand is slightly purplish. Very interesting colour. It taste good as the paprika goes well with carrot. This bread is soft and fluffy and can be eaten plain.


Try it .... It's a keeper!!!!

Wednesday, April 7, 2010

Pandan Chiffon Cake


I have not been baking chiffon cake for a while, especially Pandan Chiffon Cake.

I love this cake but have not baked it much as I am kind of lazy to pound the pandan leaves to extract the juice. Yesterday while working out in the gym, a friend told me that the pandan leaf can be blended and used in cake making. Every bit of the leaf can be consumed. Since pandan is used as a diuretic and is believed to be able to lower the Uric Acid in our body, I decided to bake one today.

I did not extract the Pandan juice by pounding it. I cut the pandan leaves into small piece and blended it with a small amount of water.

Here is my recipe :

Pandan Chiffon Cake

Ingredients

  • 4 egg yolks (Grade A)
  • 40 ml corn oil
  • 100 gm superfine flour
  • 60-70ml fresh coconut milk
  • 2 pandan leaves blend into juice (add 1 tbsp water)
  • 5 egg whiles (Grade A)
  • 50gm castor sugar (add more if preferred)
  • 0.5 tsp lemon juice (optional)

Method
  • Preheat oven at 170 C.
  • Combine egg yolks, oil, flour, pandan juice and coconut milk.
  • Mix till well blended. Set aside.
  • Whisk egg white till frothy
  • Gradually add in sugar and lemon juice and whisking till soft peak is formed.
  • Whisk in 1/3 of the egg white mixture into the egg yolk batter till well combined.
  • Fold in another 1/3 of the egg white mixture followed by the balance. Do not over mix the batter
  • Pour the batter into a chiffon cake tin (18cm) and bake in the oven for 25- 30 mins or till the top is golden brown.
  • Remove the cake from the oven and invert it while cooling for 30 mins.
The cake is very fragrant and it has a nice green hue. Since I blended the pandan leaves till fine, there were no bits and pieces of pandan leaves in the cake !!!!

I shall blended my pandan leaves whenever pandan juice is called for ;-D

Sunday, November 22, 2009

Fatt Koh (Steamed Rice Cake)


Fatt Koh (Steamed Rice Cake) or Huat Kueh in Hokkien is a must for Chinese during prayers. Every 1st and 15th of each Lunar month, the Chinese will offer this cake at the altar for prayers. "Fatt " or "Huat" means prosperity while "Koh" or "Kueh" means cake. It is made from rice flour like muffins and normally pink in colour. A good Fatt Koh is one that cracks in the middle resembling a "smile". It is sold in abundance on the eve of the 1st or 15th of each Lunar month in shops or stalls as not many people make them by themselves. My children like them but I hardly buy them as I find store bought ones too sweet for my taste. Moreover, I do not like to consume the colouring that is used to made them sweet pink.


Thanks to my gym buddy, Fiona, I am now able to make my own Fatt Koh that is less sweet and no colouring added. This is a foul-proof recipe that her mother-in-law perfected after 3 years of experimenting!!!. She has been using this recipe every month and I have tried it many times too!. Result has always been PERFECT!!! My children will be smiling from ear to ear everytime I make them.


Huat Kueh

Ingredients :

1 bowl cooked rice

½ pc crushed wine yeast biscuit (chow paeng)

2 tbsp water

1 ½ cup sugar

4 ½ cup water

500gm rice flour (1 packet)

1 ½ tsp – 2 tsp ENO fruit salt

Method

1) Cool cooked rice in a container.

2) Add 2 tbsp water and sprinkle crushed wine yeast biscuit on the rice.

3) Stir until thoroughly mixed and leave to ferment for 3 days 2 nights (ie if mix on Monday it will be ready on Wednesday)

4) Blend fermented rice into blender with sugar and 1 cup water.

5) Add in rice flour and the rest of the water.

6) Be sure that there is no lumps in the mixture.

7) Keep in airtight container for 7 hours for fermentation.

8) Sprinkle ENO on batter.

9) Stir well and pour into moulds (with paper cups).

10) Steam for 15minutes.